A need to copy some Kodachrome slides for a relative and not having any way of scanning them since selling my old Epson V700, led me to looking at other options. I didn’t fancy buying a dedicated slide holder for my Nikon scanner for a one off job, so I looked into camera scanning. There are loads of articles and youtube videos on this current trend as people seek to use what they have digital camera wise in order to scan negatives or slides of course. There are also some excellent looking negative advancing rigs by the likes of Valoi and negative supply, as well as plenty of light boxes of various flavours and sizes.
One thing however that was drawing a blank was a reliable method of supporting and adjusting the camera in relation to these fine bits of film scanning gear. I imagine you can get somewhere close with a tripod. Awkward but doable… An old stand from an enlarger would also fit the bill but damn those things are big and chunky. Plus it’s the eBay minefield or travelling somewhere to have a look for a bit of kit that someone’s grandad is chucking out.
I therefore decided to have a go at making something that would be easy to use and not take up a massive amount of desk space. I have access to materials that would do the job so why not. My light source is a small Kaiser Slimlite Plano that is roughly A4, so a base that is a little bigger to allow some movement should do the trick. I used some 18mm birch ply that I laminated on the top for a durable dust free solution.
The next thing to figure out was what vertical extension I might need? To be honest I went a little overboard on this because I figured I could use the stand for photographing documents that are larger than the base if needed. I therefore settled on a vertical of 750mm. I used a sturdy aluminium extrusion 30mm x 60mm section for that. Well over the job but I prefer over engineering.
Once I had settled on these dimensions I then needed a way of supporting the camera at a right angles to the base. Plus a simple way of adjusting and locking the whole thing wherever I needed. I ended up having a bracket laser cut and bent for this. One that was sturdy enough for the job, see above comment on over engineering…
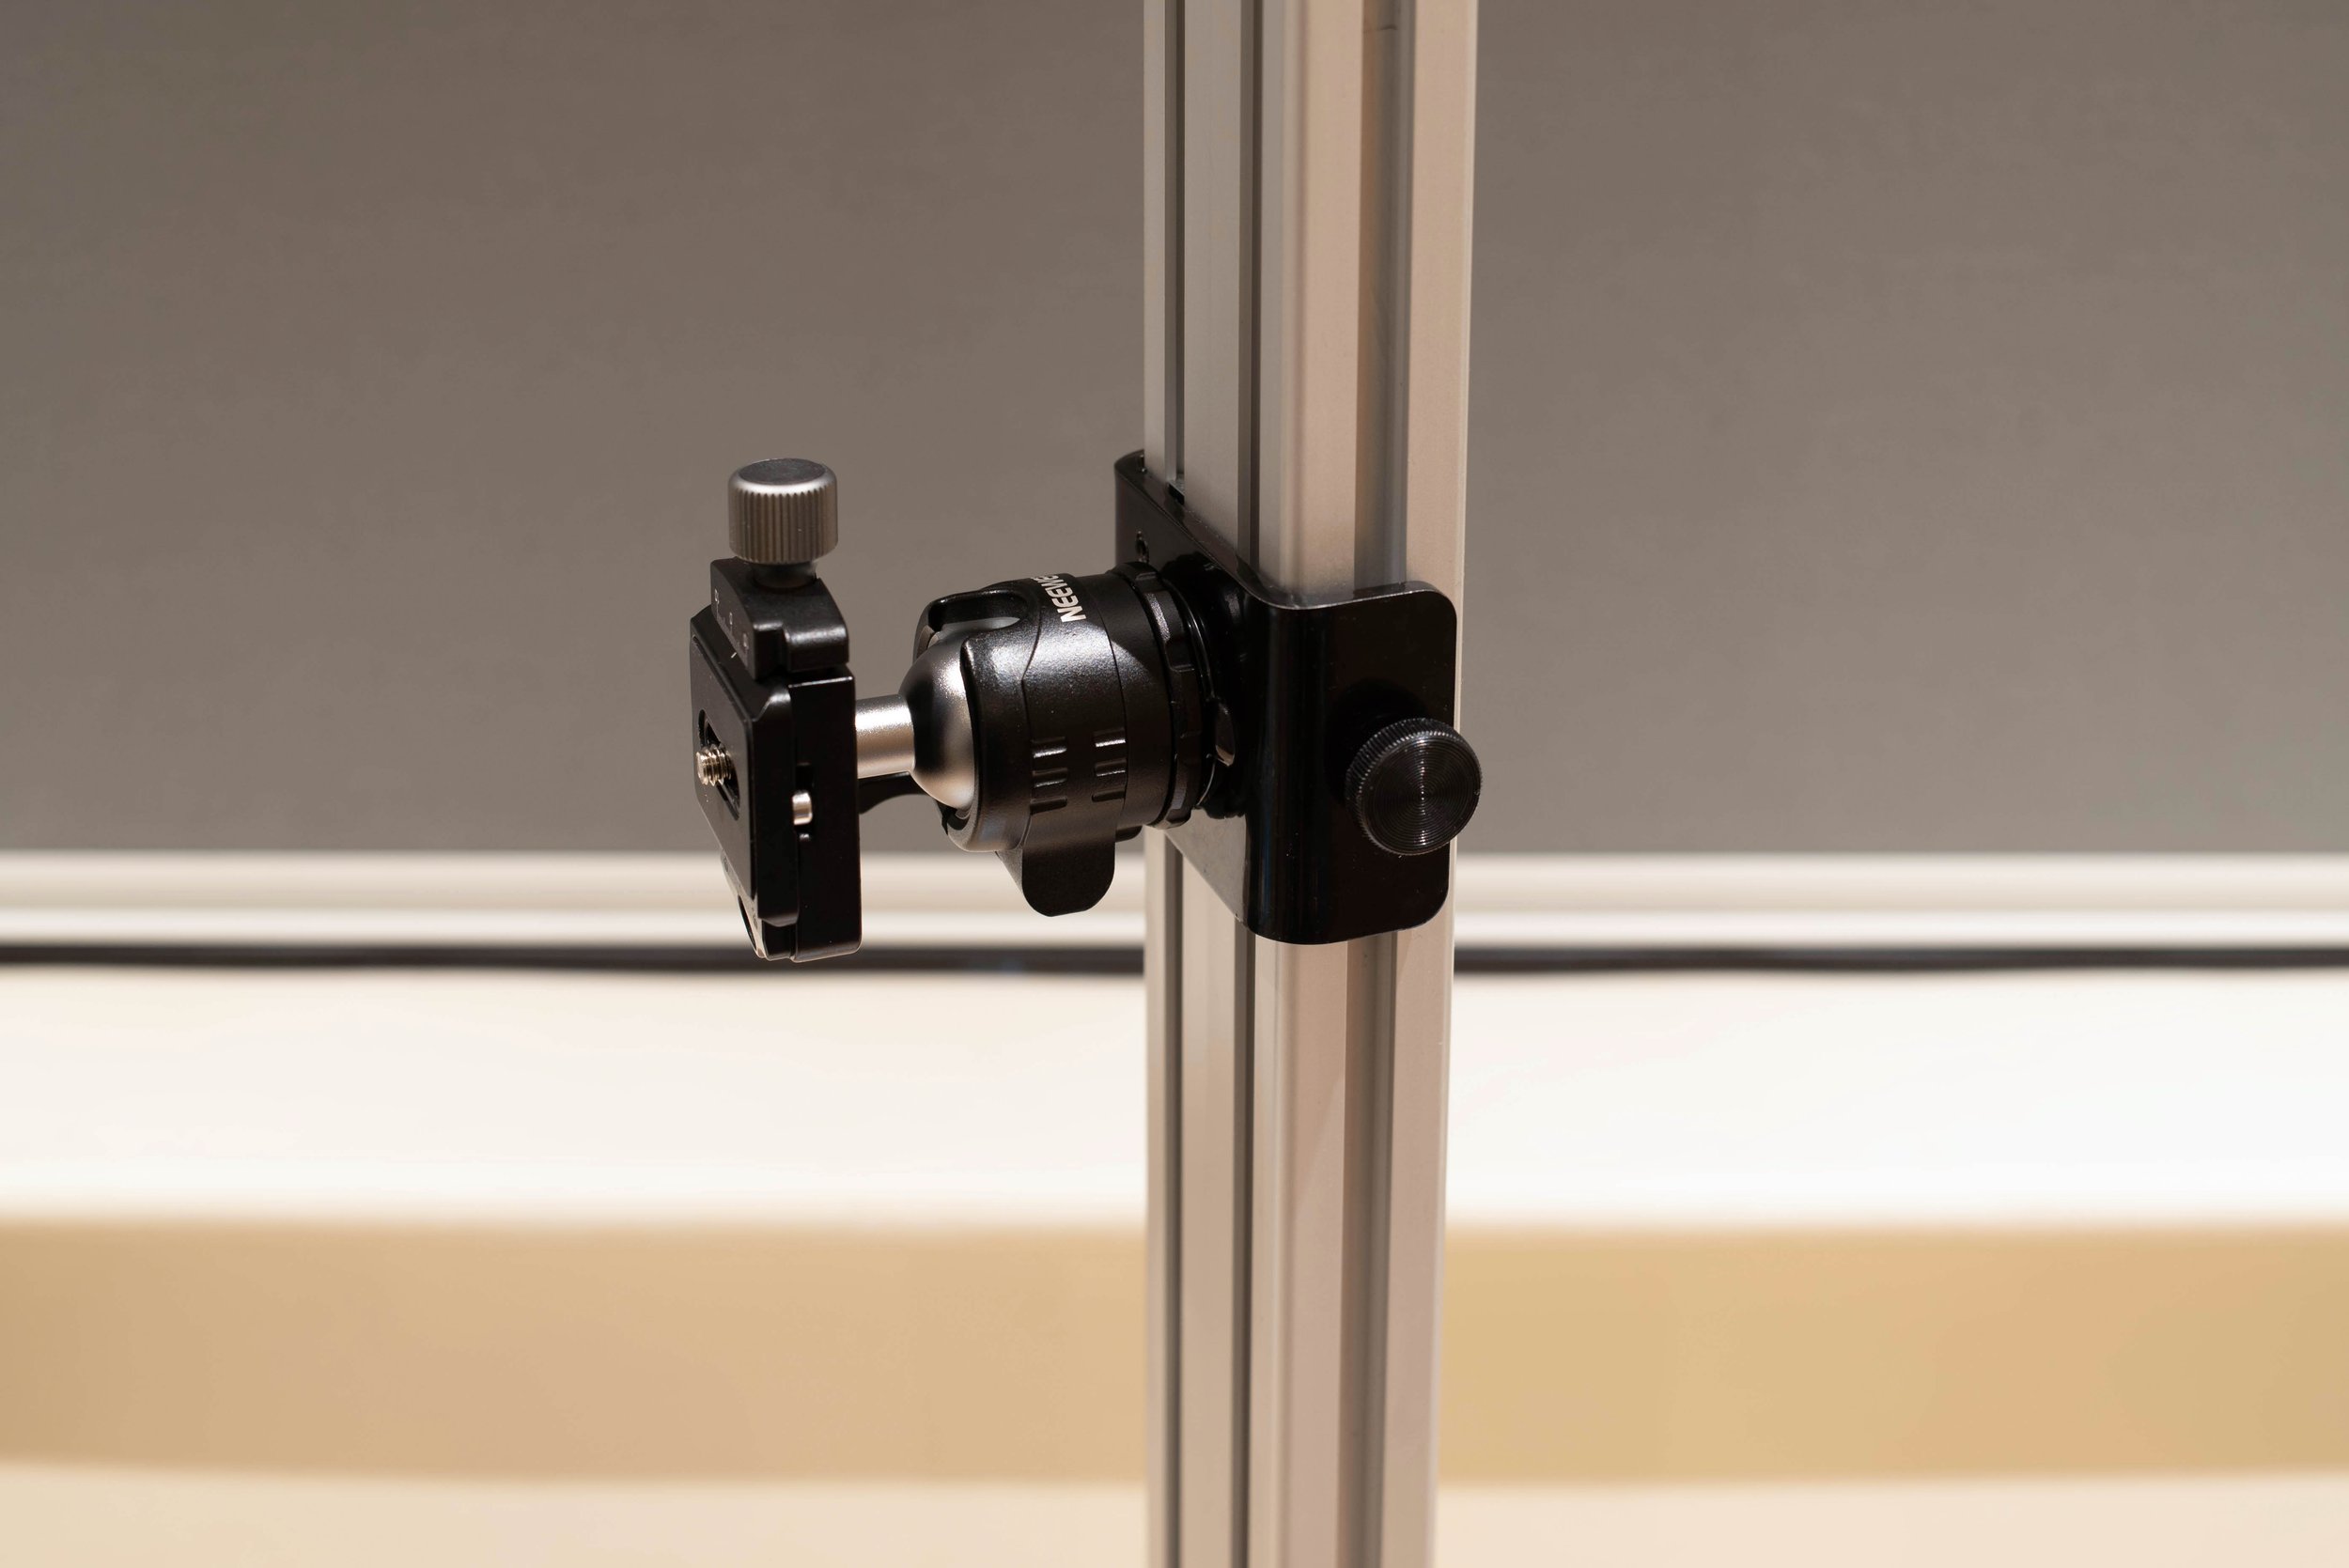
The bracket is U shaped and fits nicely around the profile, I made it from 4mm steel with holes in the sides and front. For the thread that was to take a standard tripod head I used a countersunk bolt with a 3/8” UNC which I welded into the back of the bracket after countersinking the bracket to take the bolt head. I also needed a thick washer on the face of the bracket for a tripod head to sit against The protrusion of the bolt was a tad too much. I welded a nice big flat washer onto the face to take care of this. Once I had dressed the welds I had the bracket powder coated black.
The locking off duties are taken care of by a thumb turn on either side of the U bracket. They screw into proprietary sliders that have an m6 thread and fit inside the profile. These sliders have a small spring on the back for a little support and to prevent the m6 of the thumb turns from marking the aluminium profile.
A simple 1/4 turn of these on each side loosens them enough to allow movement. I also put another support on the front of the bracket to give a smoother slide when the camera is fixed, due to the extra weight pulling on the side sliders. This is fixed via a grub screw that can just be seen on the closeup picture.
I have been using this stand for a little while now and it’s working great with no major flaws, in fact I have supplied a few to friends that scan their own negatives and were in the market for a decent solution. I made a few extra mount brackets and ply bases so that I could do a small production run from home so if anyone out there needs a stand I can supply them, with or without a ball head if needed.
I can sell one for £155 including a Neewer ball head or £125 plus post and packing
Send me a mail through the website or contact me on the social channels if you are interested.


